 +
+
 =
+
=
=
+
=
Fill up your desired quantity of liquid directly through the straw.
Press a button to start pouring, release it to stop pouring.
Trampolino can pour discrete units of liquid automatically.
Through the calibration procedure you can teach Trampolino how much liquid corresponds to a unit.
You can instruct Trampolino on quantity, timing and frequency of automatic liquid pouring.
Trampolino displays information about the remaining time at which the liquid is going to get poured.
No pumps, no big motors, and no secrets. Trampolino hardware and software are open and documented.
Start building your trampolino now!
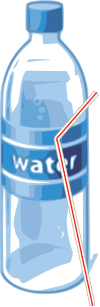
Believe it or not, the most complicated part of the project is to insert a straw upside down into an empty plastic bottle.
Can you do that?
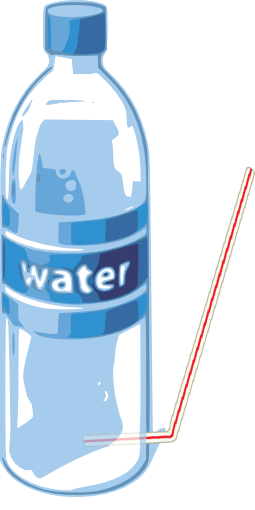
I have heated up the bottom of the plastic bottle with the tip of a how glue gun and penetrated the bottle with the straw when there was enough heat.
Make sure there is no leak.
The next step is binding the arm of the servo motor to the straw. I've used some tape to do so.
Depending at what height of the bottle you have managed to attach the straw, you may need to fill the extra space between the bottom of the bottle and the bottom of the servo motor. For example, you can bind the servo motor to the cap of the bottle.
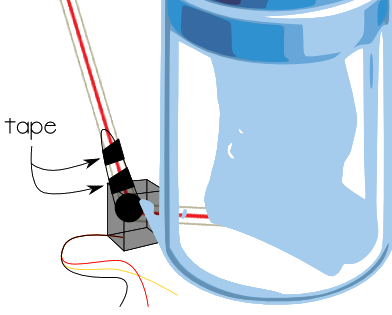
Trampolino requires a "liquid passing sensor" at the tip of the straw. This is made up of a couple of wires that close a circuit when the liquid passes through the tip of the straw.
Use some tape to bind the two wires at the end of the straw as shown below:
You can optionally mount a led that will turn on to indicate whether the liquid is flowing. Just extend the ends of the led with two wires and bind it to the end of the straw with more tape.
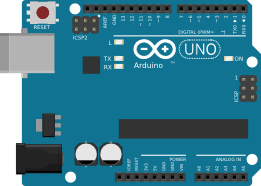
We are about to deal with Trampolino electronics. A step-by-step guide is about to begin, but don't worry if you get lost. You can refer to the schematic and the breadboard connections below at any time to double check the connections and see where you are at.
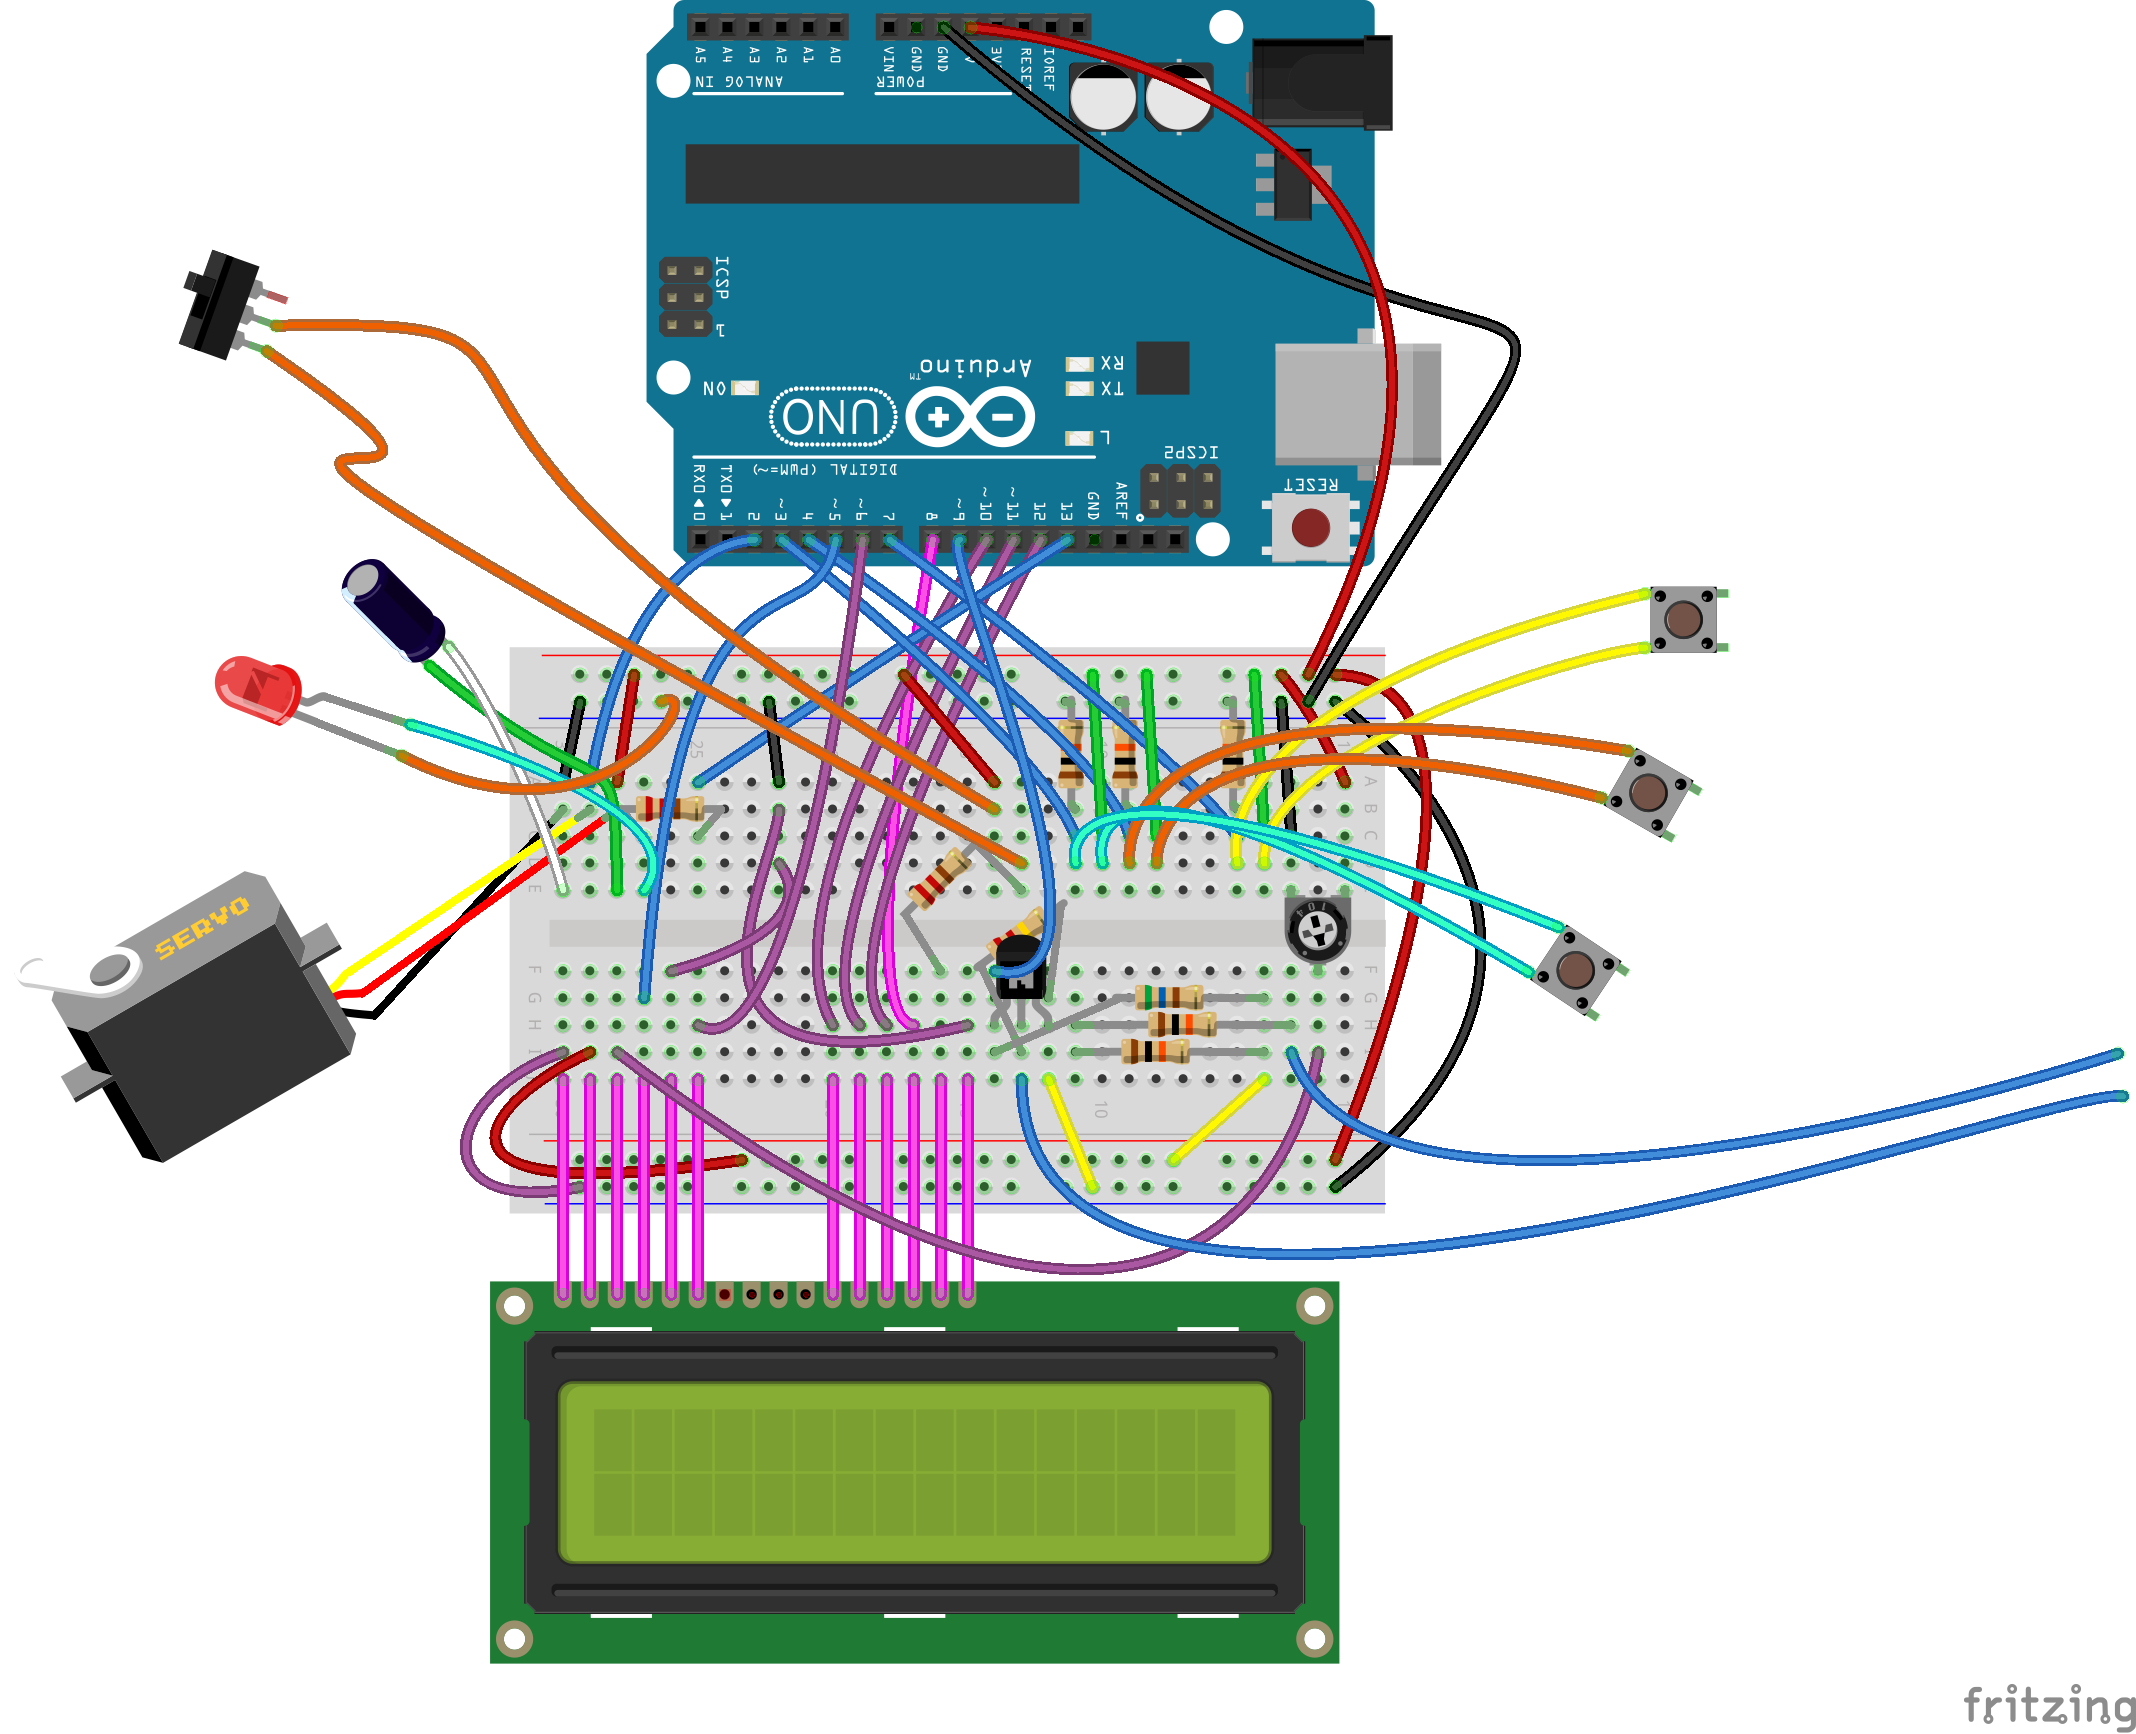
The breadboard connections look quite messy, so let's stop looking at that horrible picture and go ahead dissecting each part of the circuit in a step-by-step guide.
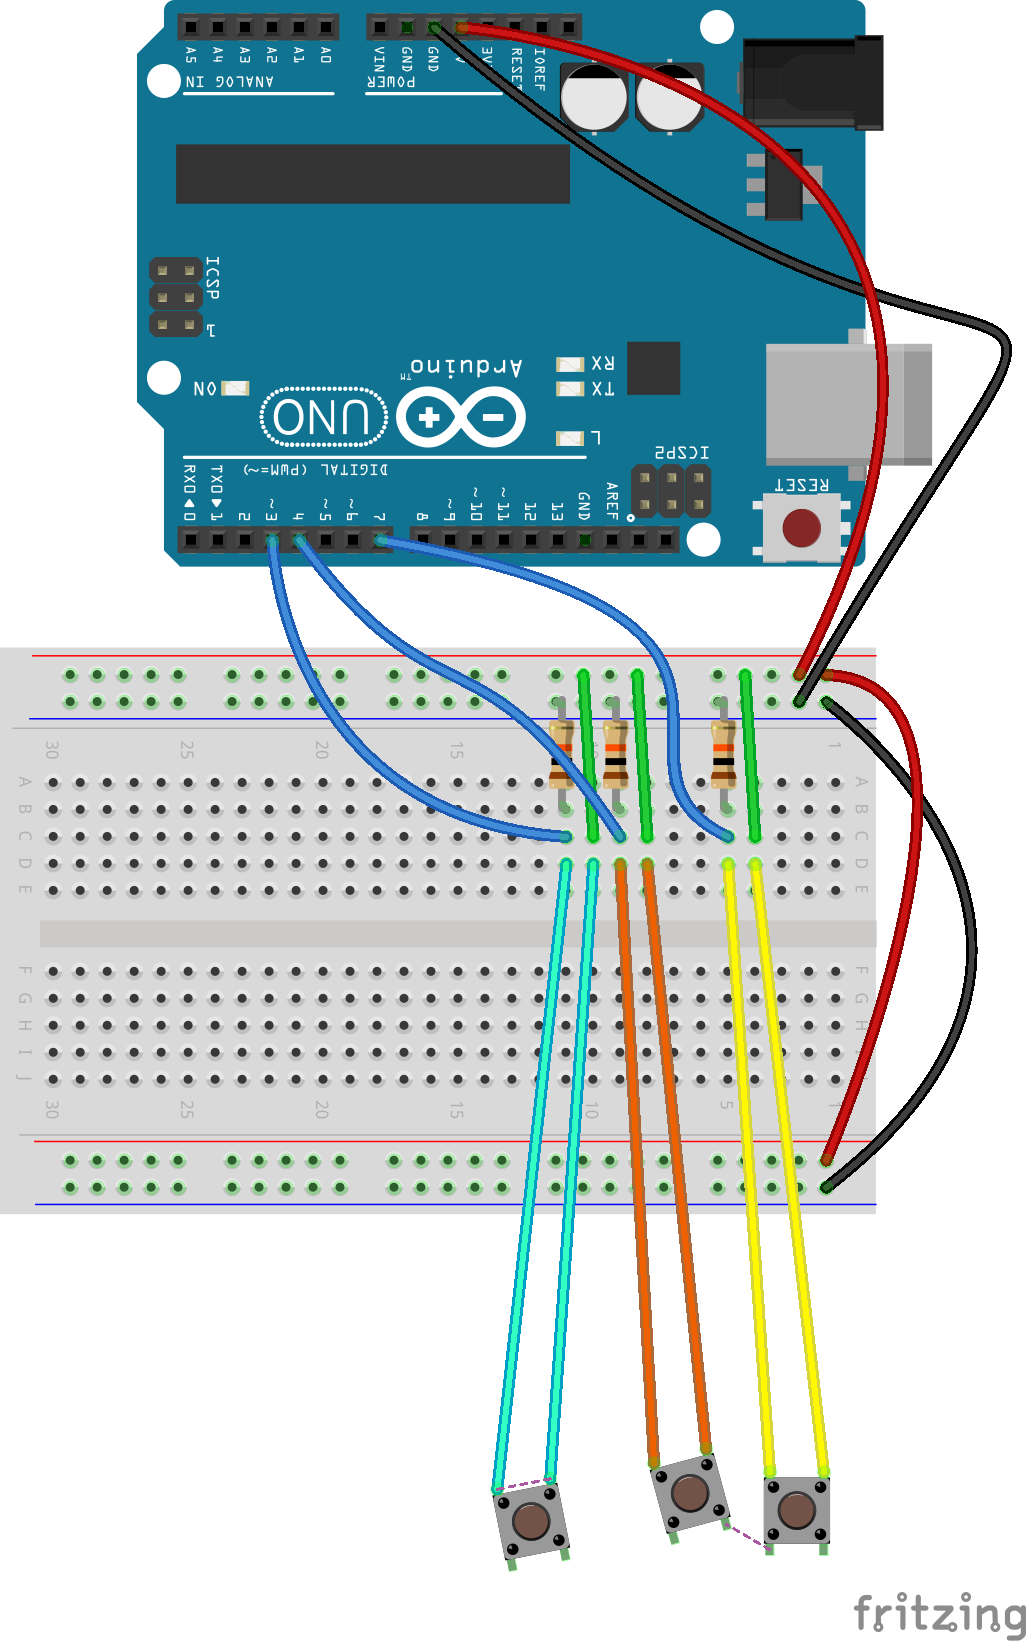
Start by connecting the +5V and GND pins of the Arduino to the breadboard. Extend these connections to the other side of the breadboard as shown. Connect three push button input circuits. The push buttons are supposed to be far away from the breadboard, so you would need to connect long cables to them. In my project I've used buttons that looks like this, and connected each of them to the breadboard though crocodile wires.
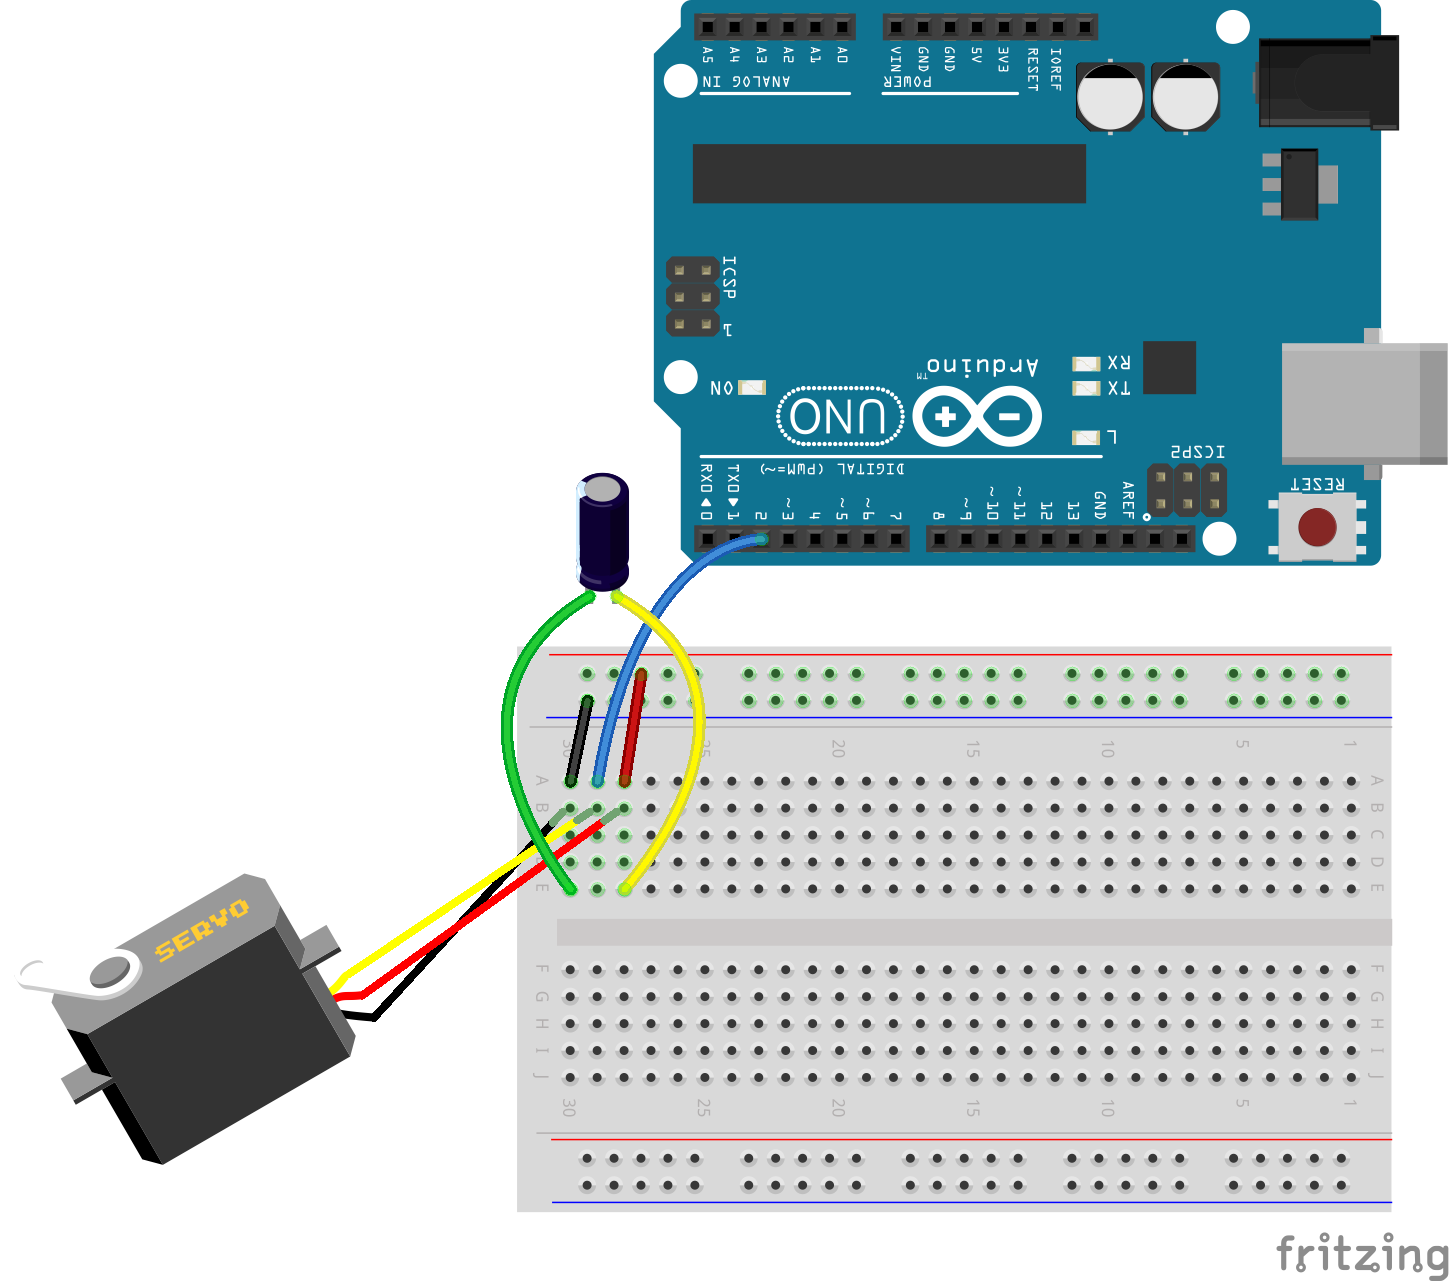
Connect the servo motor and the capacitor as shown. The capacitor can fit directly into the breadboard actually (it looks like that in the picture just for clarity purposes). Note that the polarity of these connections is important.
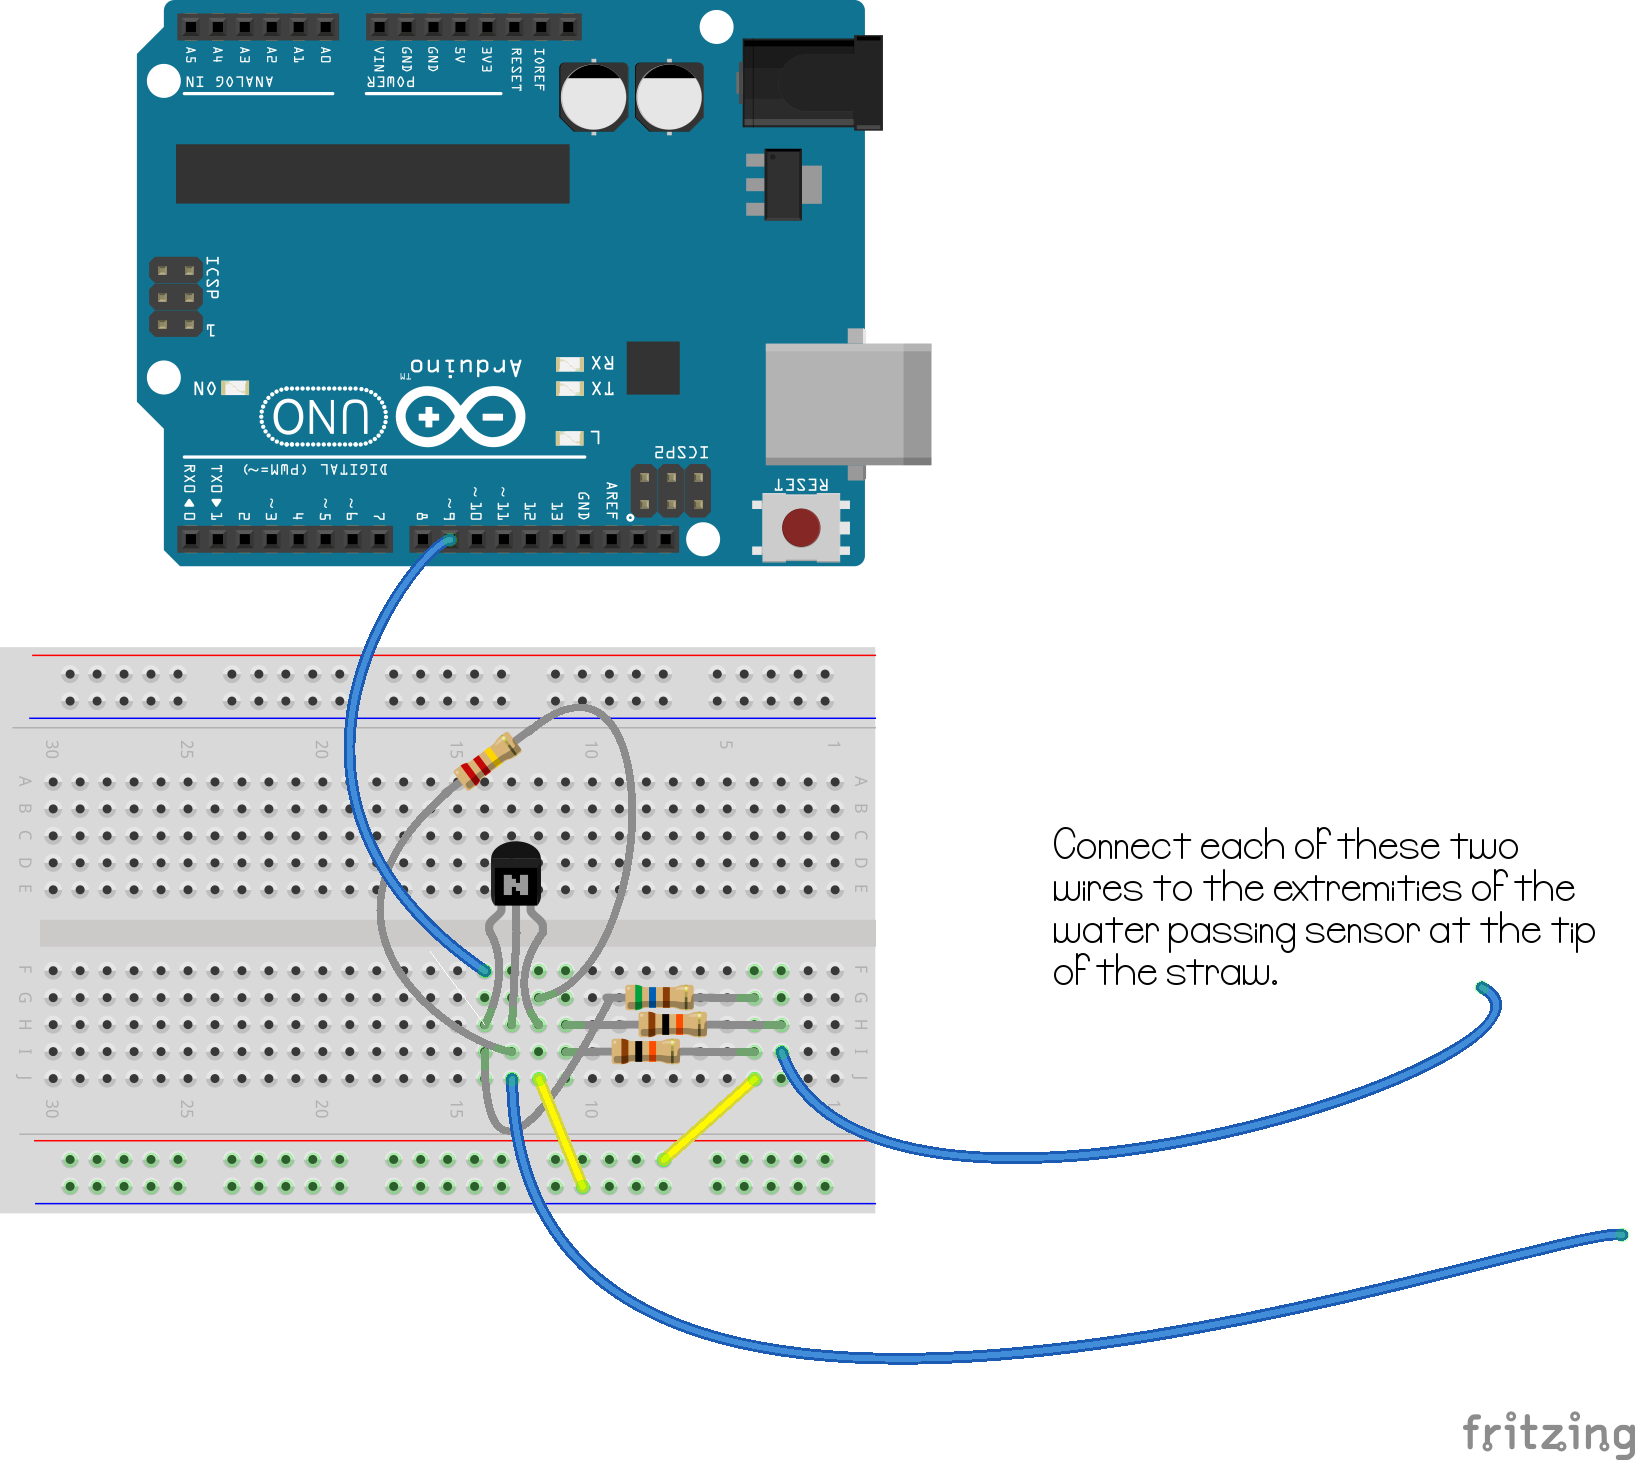
This is our liquid passing detection circuit. The two floating cables must be soldered or connected somehow to the wires at the tip of the straw we have prepared at step 4 of the previous section. I have no other particular note about this step.

Connect the led we have prepared at step 5 of the previous section to the breadboard. This step is optional. As you can see I'm using the pin 13 of the arduino, which is already connected to a small led on the arduino board. If you skip this step, you won't have feedback about liquid passing through the straw at the tip of the straw.
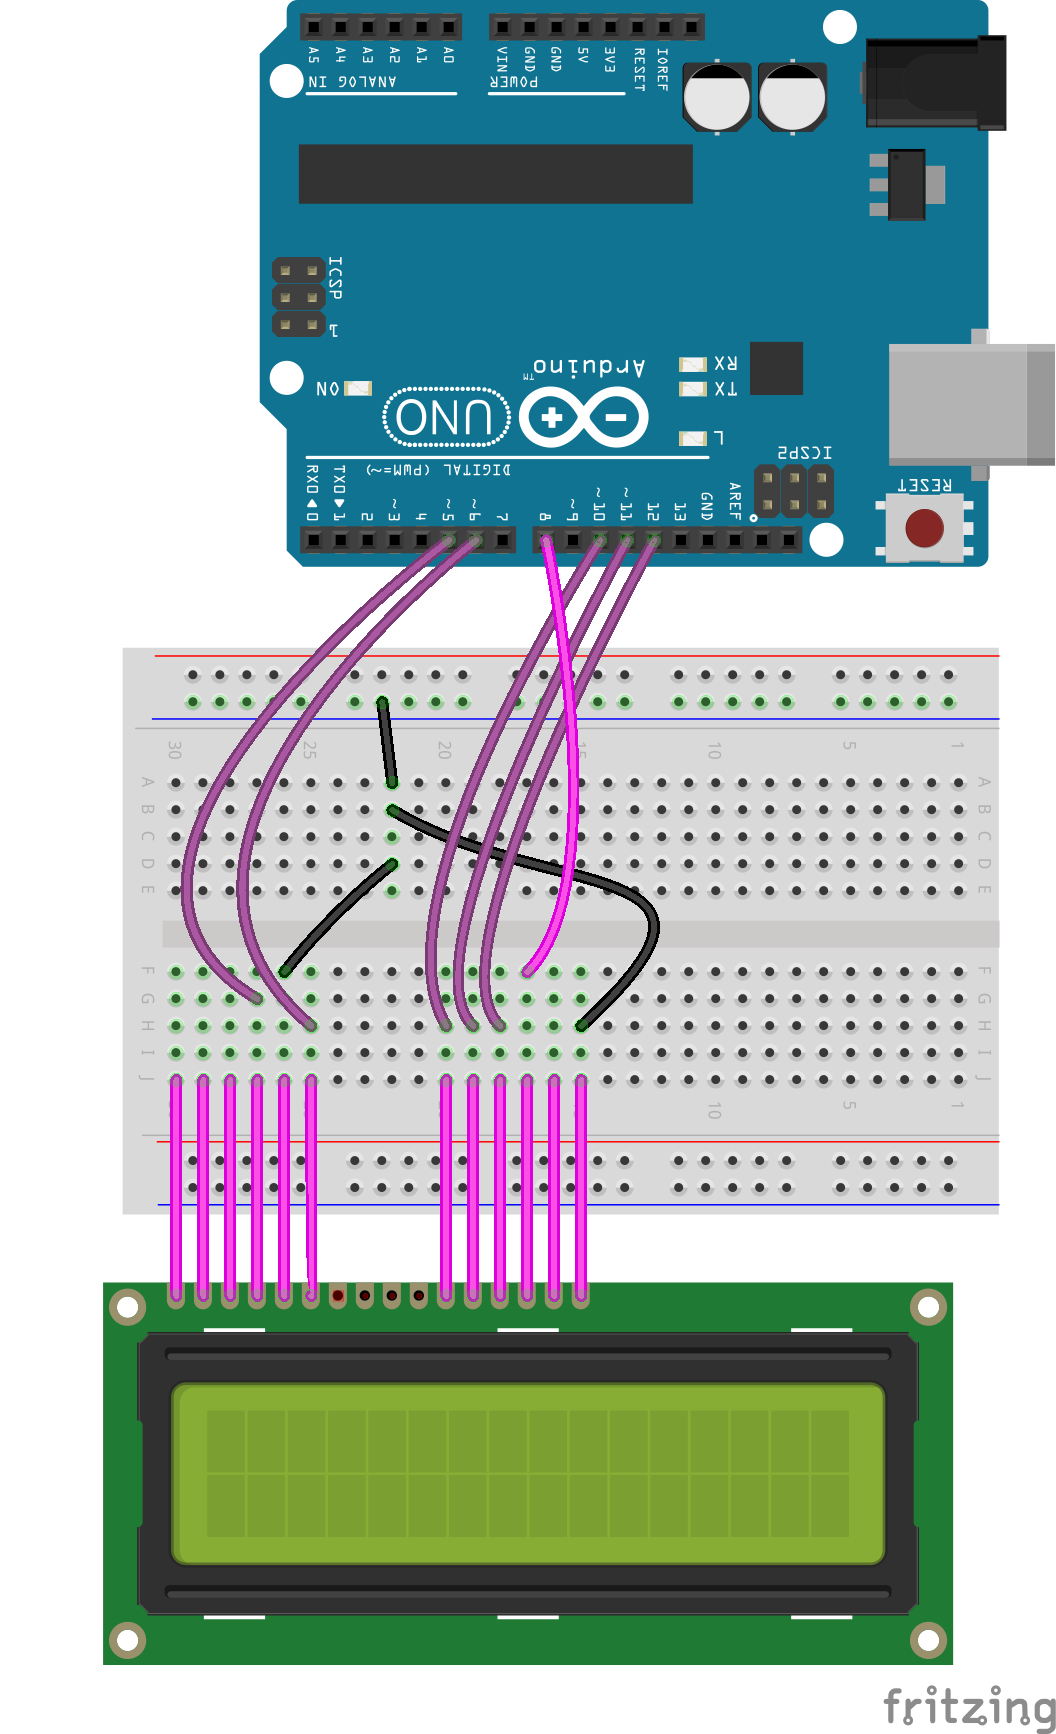
You don't need to solder 12 wires from the display to the breadboard if your display has headers. If this is the case, just plug it on the breadboard as the very last step of this tutorial.
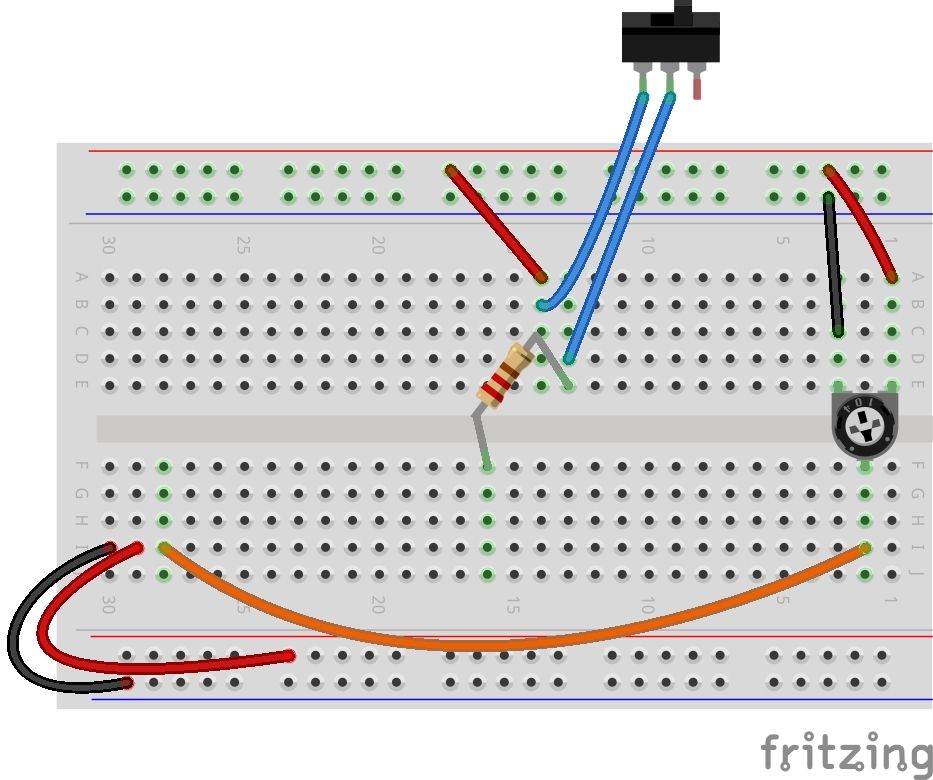
Finish up connecting the display. As you can see, there are two mini circuits here.
The potentiometer can be used to tune the backlight of the led display.
The on/off switch is used to turn on and off the backlight of the display. I just don't like to have lights on if I'm not using a device... but if you don't mind you can connect that resistor directly to +5V and skip the switch connections entirely.
Note the curve cables at pins 29 and 30 of the breadboard. They are curve because a display with headers may sit over them (see previous step).
This will be hopefully your less painful step. You can download the source code for the software from the link below.
Then extract the zip archive and follow the instructions in the README.md file. Feel free to star, fork and contribute to improve Trampolino software via GitHub.
All constructive comments about this project are welcome!
comments powered by Disqus